What is a Lead and how to profile and contact them
In order to better communicate with your leads it’s important to know what they want. The best way to do that is to profile them. We have many tools and profiling categories for you to use, which come in handy when you need to filter your leads for important messages and requests.
Assigning leads:
Leads are flowing in and you understand how to profile them and the importance of this, but the question remains who will be managing all these valuable leads. This is where assigning leads is important. The last thing that you would want is a lead slipping through the cracks, so it’s important that incoming leads are assigned to the correct agents so they can be contacted and converted into a homeowner. A principal agent will be assigned to each development to manage the leads coming in from your listing and they will have the responsibility of assigning leads to different agents. If you upgrade to our Standard and Pro account you can even create teams which is invaluable when you work within a large company under one account.
If you are the Agent principal or admin of an account, all new lead notifications will be sent to you via email, it will look like this.
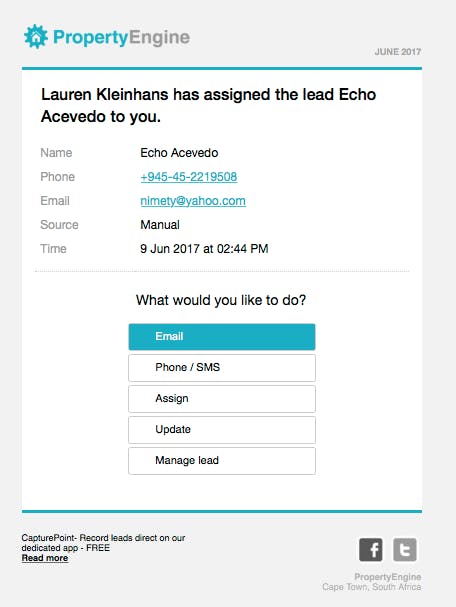
At this point you can decide to reply to the lead. You will be directed to a smart reply window on your desktop if you have a Standard account. From here you can reply directly to the lead using pre-loaded smart responses or your own response. You can also launch your email browser, phone your lead (this will work with Mac if you have an iPhone connected to your mac book – otherwise will only work if you open the lead notification in your phone emails), sms your lead (this will only work if you open the notification in your phone emails), assign your lead to another agent, or manage the lead yourself. Assigning and managing your lead will redirect you back to your PropertyEngine account.
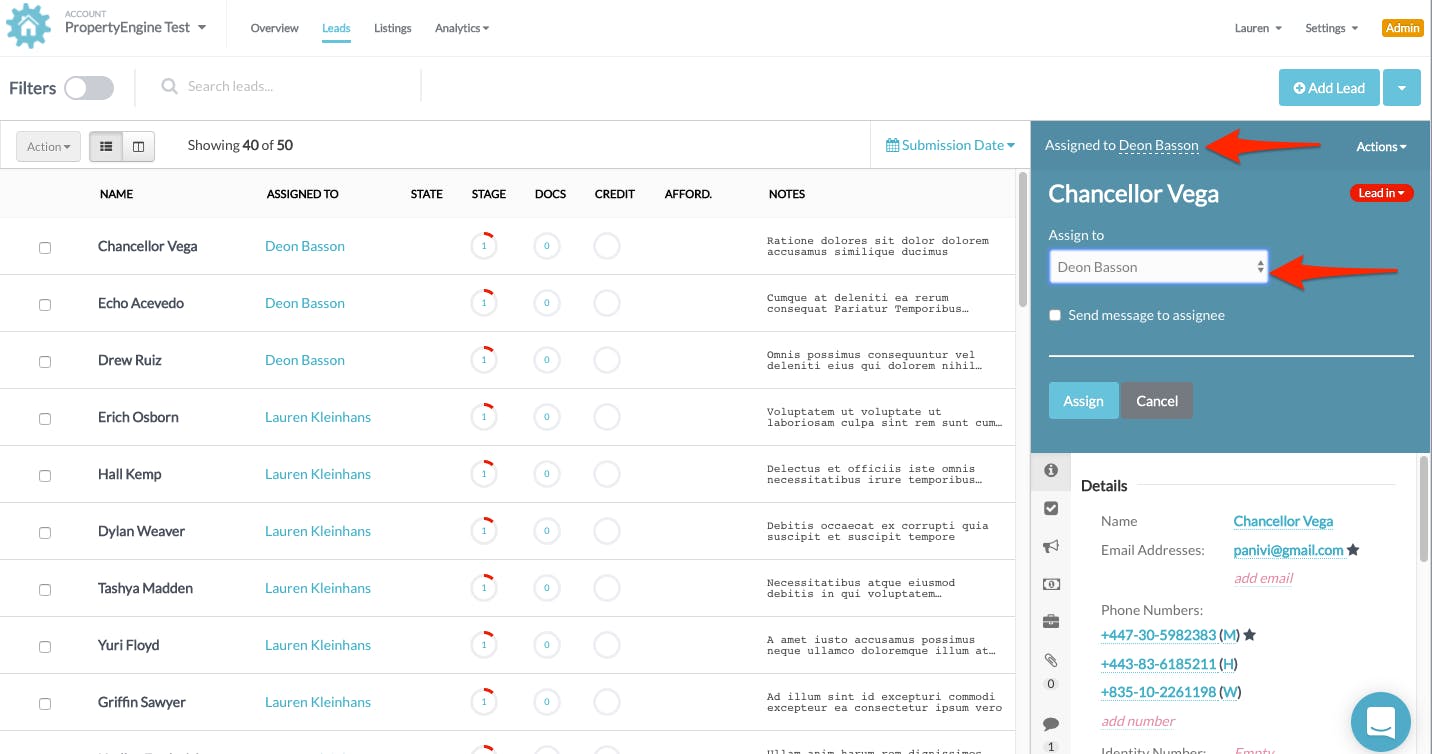
You can also change who the lead is assigned to, if you are an admin or principal agent. You simply need to click on the lead you wish to change, the right profiling window will appear. On the top right corner you can view who the lead is assigned to, click on the name of the agent assigned to the lead and a drop down menu of the available agents will appear, select the agent you wish to assign the lead to.
Importing leads into your account:
If you have an existing database of leads that you wish to manage conveniently from one location, you can upload this into your PropertyEngine account.
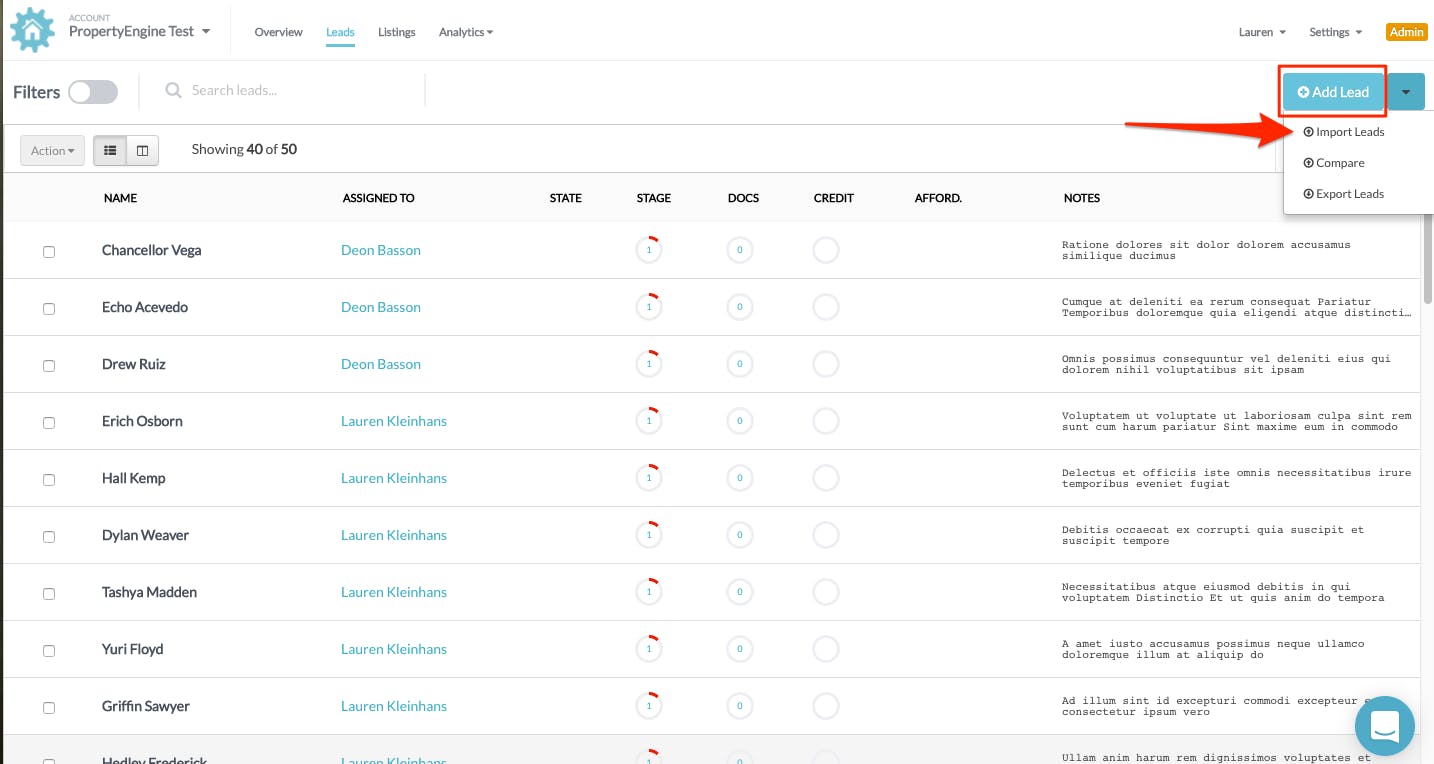
This process is quite straightforward. Step 1: Simply click on the development you wish to upload the lead database into. Select the “leads” tab on the top tool bar, you will be directed to the lead list page. On the top right hand corner there is a button called “Add lead” and next to this there is a down arrow, click on the down arrow and an “import leads” tab will appear, click on this.
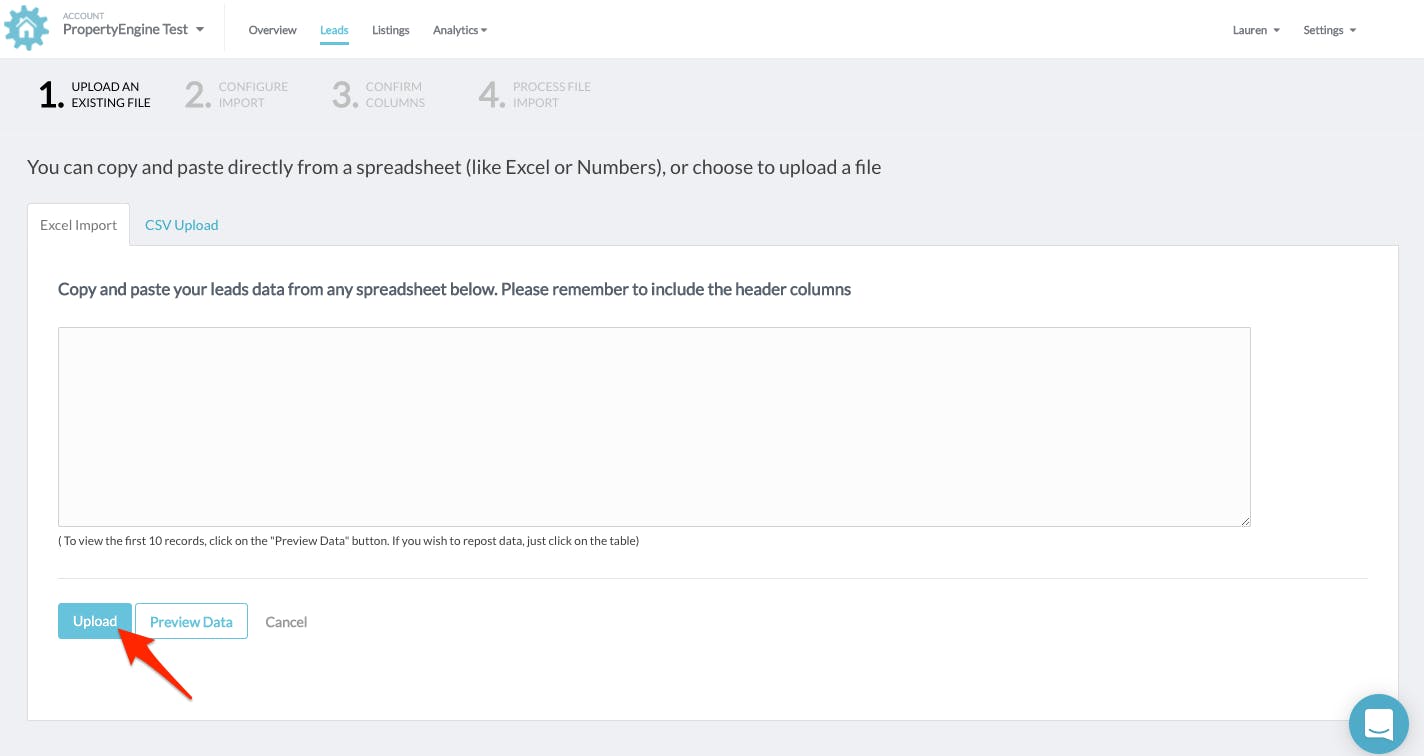
You will be redirected to an upload page where you can copy and paste your list of leads, or import a CSV or excel database.
Step 2: You will be asked to categorise your lead information, using the tabs on the left hand side. Simply drag and drop the tags into the correct columns.
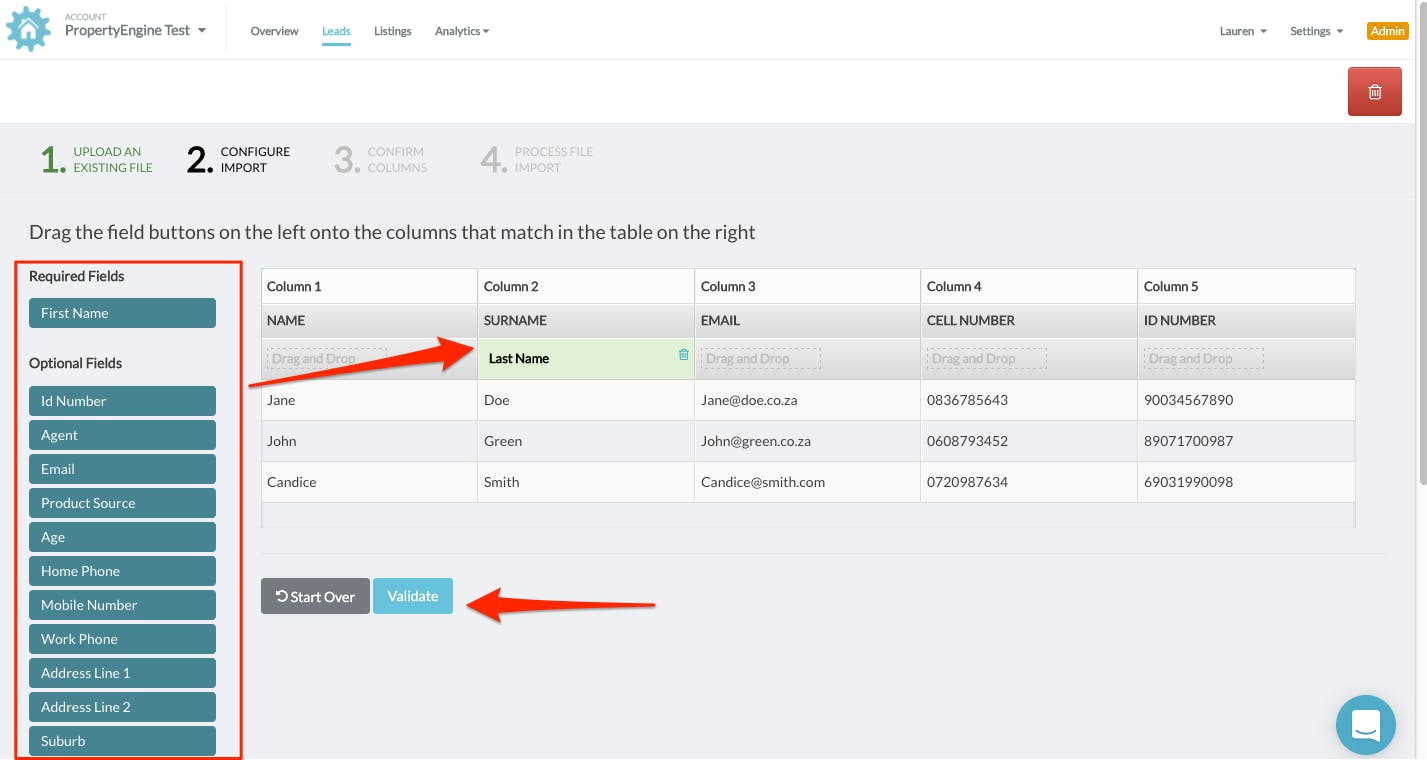
Step 3: You will be asked to confirm all the columns and information is correct once you are happy you can proceed to the final step and upload your database.

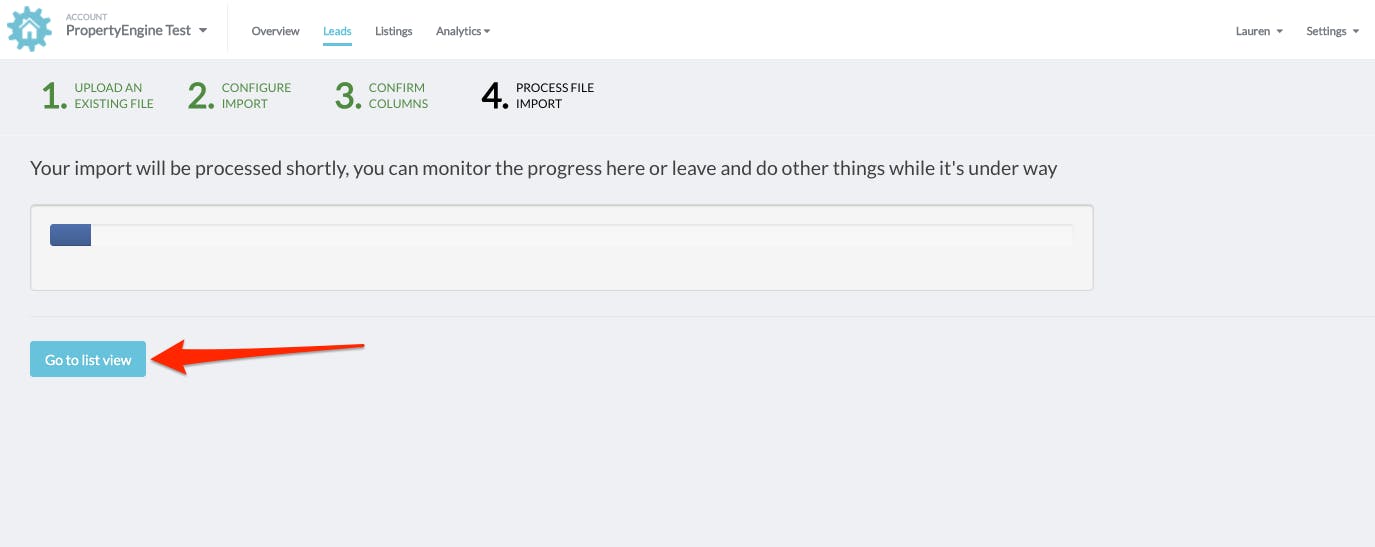
Step 4: You will be shown the progress of your lead database import and you can go back to your PropertyEngine account dashboard to continue profiling leads or updating your listings while the import completes.
Requesting documents from leads:
Once your lead database has been imported you can request any documentation you may need by sending a document request email. The best part is everything is loaded straight into your PropertyEngine account where it can be managed from one convenient location.
You can even create your own custom document requests as explained above.
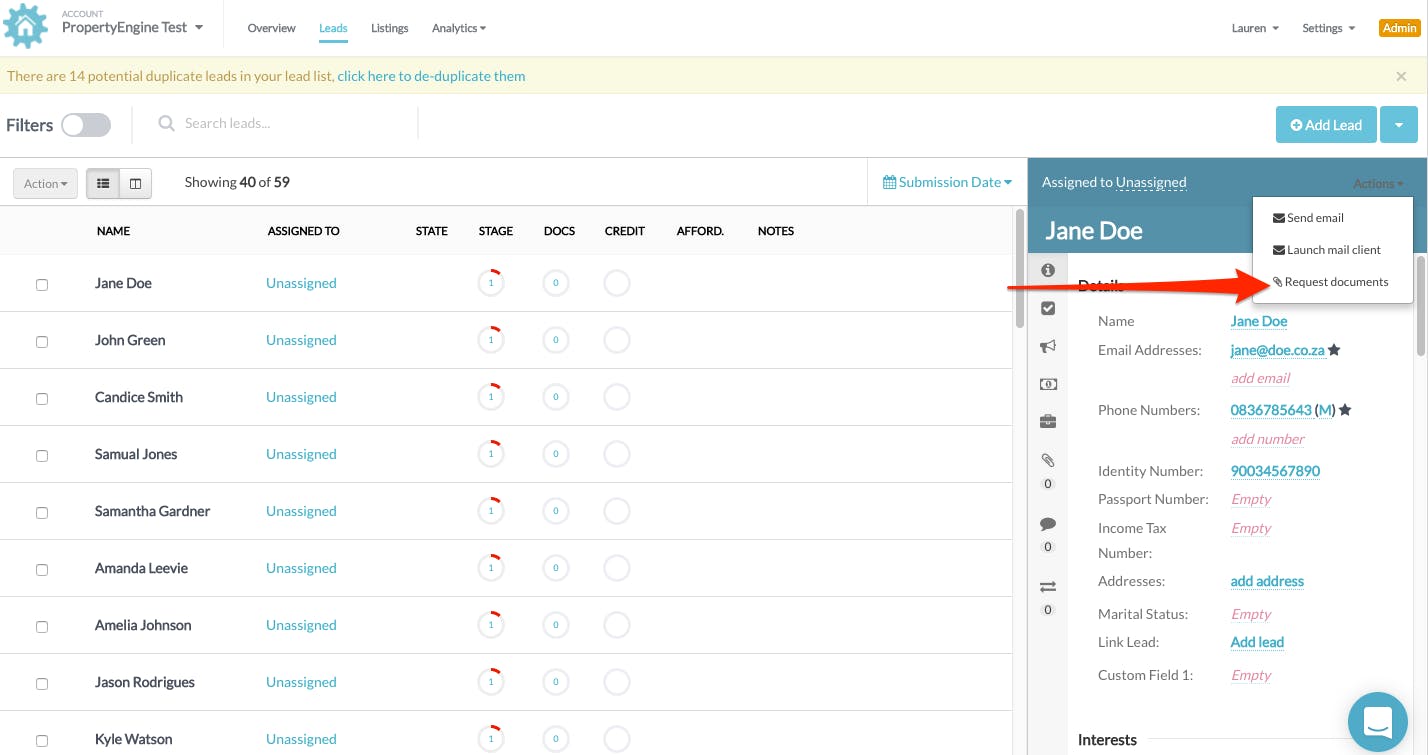
To request documents from your leads, select the lead you would like to request documents from. Click the "Actions" button next to the assigned agents name and a dropdown should appear. Click on the “Request Documents” option.
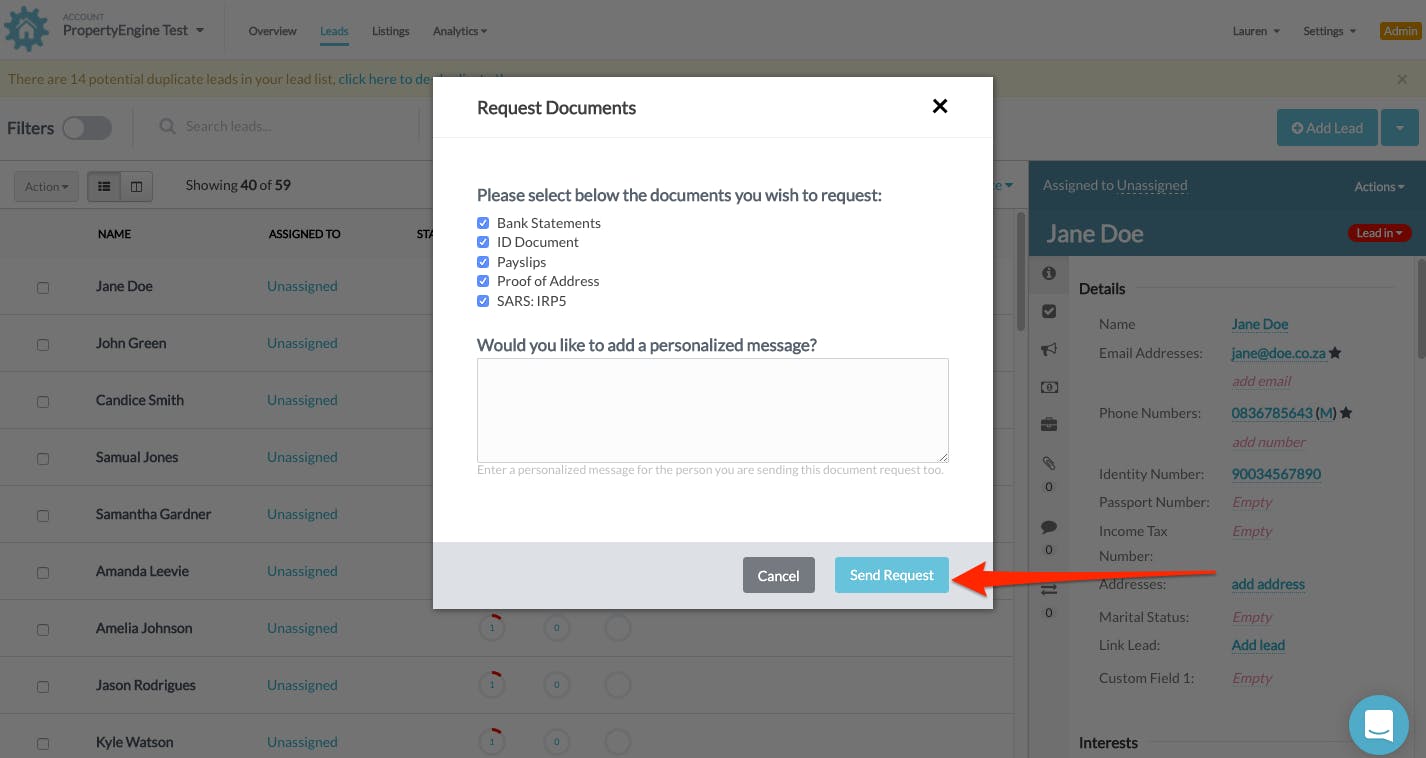
A window will pop up where you can select the documents you would like to request from the lead as well as insert a personal message. If you have already requested a document from a lead that document will be unchecked.
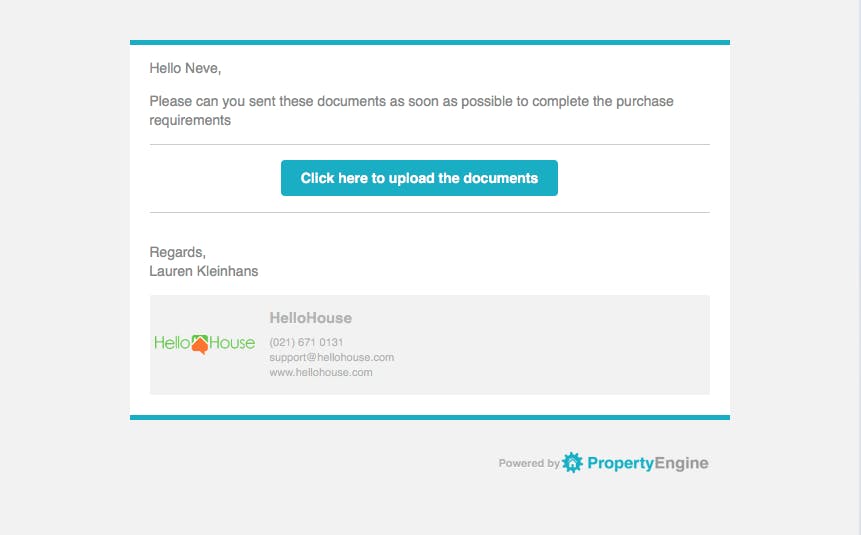
The request that the lead will receive will look like this and they are able to upload the documents straight into the LMS from here.
We have recently added a Standard package feature whereby all requested document emails can be branded with your company logo and details. Take your communication to the next level by upgrading to a Standard account.
Watch the helpful video tutorial
How to manually add a lead
Manually capturing a lead to your lead list is very easy. Simply go to the leads tab on the top menu bar.

Add Lead button
You will be re-directed to your lead list - here you will see in the top right the "add lead" button.
Click on this and a lead capturing form will appear. Here you can fill in all the lead information

Adding another lead
If you are adding more than one lead remember to select the "Add another lead" check box.

How to profile your leads
To profile your leads you need to click on the development you want to view the leads for. You will be taken to that developments performance home page. On the top toolbar there is a tab called “Leads” click this.

Click on lead to view information
Your list of leads for that development will appear, to view information on any of your leads simply click on them and a profiling toolbar will appear on the right side of the page

Click on fields to insert information
You will notice there are various categories, namely:
Details, Financial, Employment, Interests, Marketing, Documents, Notes, Activity
If you click on any of the fields you are able to insert information on your leads. Some categories have drop down menus like the financial ratings tab that you can select options from and others are just manual entries, like the passport number/ID number tab. These will all assist you in profiling your leads making it easier to search and filter leads and communicate with them.

Click "Settings" tab to further customise
You can customise the financial rating, marketing sources and interest drop down tabs by clicking on “Settings” in the top right hand corner and scrolling down and selecting the “Lead Profiling” option.
You will be redirected to the lead profiling page.

Lead profiling page customisation
The Lead profiling page allows you to add and change the marketing source fields (how your leads came to know about your development), interest tabs as well as financial rating tabs. Simply click into each of the tab text boxes and amend, as you prefer. Any changes will be automatically saved.

Adding custom fields to profiling toolbar
You can also add custom fields/categories to the profiling toolbar by clicking on “Settings” in the top right hand corner, and scrolling down to “Lead Custom Fields”. You will be re-directed to the Lead Custom Field page where you can create your own unique profiling fields.

Adding and creating documents to the Lead Documents page
You can add and create new documents that you request from your leads by selecting “Settings” and scrolling down to “Lead Documents”. This will redirect you to the Lead Documents page.

Click on documents to edit or create a new lead document
You can add and amend documents that you may like to request from your leads here. We will talk more about requesting documents from leads and why this is important further on.
